

How To Create A Collage In Lightroom Cc

We get asked all the time if it's possible to use Lightroom to create collages to share on social media and blogs. The answers is a big YES!
Not only is it possible but it's also simple to do once you understand how to select your settings and add your images. And once you create a your collage template, it's also easy to save them for use next time!

How to Create a Lightroom Collage
Follow the steps in these instructions and watch video below to easily create a Lightroom Collage for use on your blog or social media!
Getting Started
To create a collage or blog board in Lightroom's Print Module, you will first need to have open all the photos that you want to use. If they are all from the same session and in the same folder, you can just have that folder open as you move to the Print Module. If the photos you want to use are from several different sessions, then you will need to create a Lightroom Collection and add all the photos you would like to use to that collection.
Next, move to the Print Module. The Print Module is the second to last Module in Lightroom.
Creating Your Template
Once you are in the Print Module, start by choosing one of Lightroom's "CUSTOM" default templates. You can find those on the left side of the Print Module in the Template Browser Panel under "Lightroom Templates".

Once you have clicked on one of the custom default templates disregard the size that opens. We will be changing that in one of the steps below.
Select Your Custom Settings
Now move to the right-side of the Print Module and open the Layout Style Panel. In this panel make sure that "Custom Package" is highlighted.
Next, we are going to move to the bottom Print Job Panel and select the settings to be what we want for our blog. In the "Print to" section, make sure that JPEG File is selected. Set "File Resolution" to 150 ppi, make sure that Print Sharpening is UNCHECKED and that JPEG Quality is set to 100.

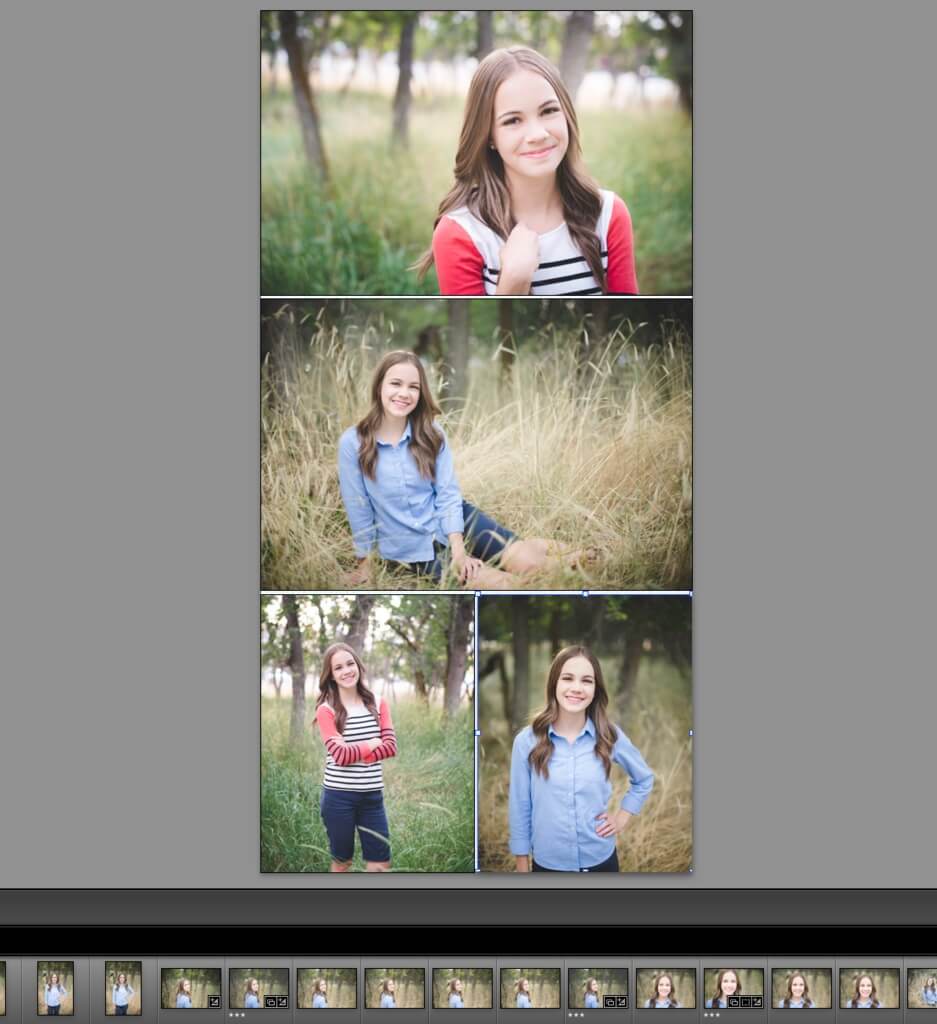
Under Custom File Dimensions we are going to set the width to height ratio of our blog board. For this example we are going to create a long, skinny board that holds 4 photos - 2 horizontal and 2 vertical. For this type of blog board I will type 10 in the first box and 20 in the second. This will give me a blog board that is approximately 1500 pixels wide. This is plenty for most any blog.
You can create other sizes and shapes of blog boards. For instance, if you wanted one that was square you could make it 10 x 10. Definitely play around and experiment with different shapes.
Adding Photo Cells
Photo cells are what will be used to hold your photos in the blog board. We need to add some of these to our template. Before adding any cells make sure that the "Lock to Photo Aspect Ratio" box at the bottom of this panel is UNCHECKED.

If your blog board has some cells left from the custom template you chose, delete those by highlighting each one and then tapping the delete key.
Now we will add the cells that we want by going to the Cells Panel. Here you will see some buttons for different photo ratios. You can click on any of them to add a cell. Once the cell is added to your blog board, resize it to be the shape that you'd like.
You can add a new photo cell by clicking on another button or alt+clicking and dragging on the current cell in your blog board to create a duplicate of the one you just added.
I like to keep a little bit of white space between each of my photos. To do this, make sure there is a little space between each photo cell.
Saving Your Lightroom Collage Template
Once you have all the photo cells how you think you want them you can save this as a template to use over and over. To do that, click on the "+" sign next to the words Template Browser on the Template Browser panel.

A dialog box will open that will ask you to name your Template and choose which folder to add it to. I typically choose to save mine in the User Templates folder that is already in Lightroom by default. You can also create a new folder and save it there if you desire.
If at any time you make a small change to the template and you want to update the template with those changes, you can right-click on the template name that will now be located in the User Templates folder and choose "Update with Current Settings".
Adding Photos to Your Lightroom Collage
Adding your photos to your Lightroom Collage Template is simple. Just drag and drop them from your photo filmstrip into the cells you just created in your template. To adjust the photo in the cell, you can hold down the command/control key and click and drag on the photo to adjust what is visible in the cell.
Saving Your Collage Image
Once you have inserted images into the cells and want to save the image for use on your blog, just click the Print to File button located in the bottom-right of the Print Module. Once you have clicked on the button, a dialog box will open and ask you to give the file a name and tell Lightroom where to save it. It will be saved as a JPEG in the folder you choose and available to post on your blog.

Next Time
Once you have created several collage templates for your blog, you will only need follow the last two steps in this process to create your blog boards. Move to the Print Module with your photos ready to go and choose one of the templates you have created, add the photos, and save it as a JPEG. Simple.
Hopefully this will help you save time sharing your images on your blog and various social media sites.
If you are more of a visual learner, we put together this helpful tutorial video that will walk you through the process of creating a Lightroom Collage.
Creating a Lightroom Collage - Video Tutorial
Bonus: Free Lightroom Collage Templates!
As a bonus, we created and put together an awesome bundle of 10 Free Lightroom Collage Templates that you can download and use. You can find them right here. Did I mention they were free! Enjoy!
Do you have any questions or comments about How to Create a Collage in Lightroom? Leave us a comment below - we would love to hear from you! And PLEASE SHARE our tutorial using the social sharing buttons (we really appreciate it)!


Gayle Vehar
Lightroom Instructor
Hi!! I am Gayle. I am a wife to my handsome husband and mom to 4 beautiful kids. In my spare time, I am a photographer and blogger at Mom and Camera. I have a passion for sharing my love of photography with others. I teach local photography classes and regularly share photography tips and tricks on my blog. I hang out there a lot—I'd love you to stop by and visit!
How To Create A Collage In Lightroom Cc
Source: https://www.lightroompresets.com/blogs/pretty-presets-blog/116547652-creating-blog-boards-in-lightroom-using-lightrooms-print-module
Posted by: hubbardwhatefteld.blogspot.com
0 Response to "How To Create A Collage In Lightroom Cc"
Post a Comment